Contact
Line : comsiam
Contact
Line : comsiam

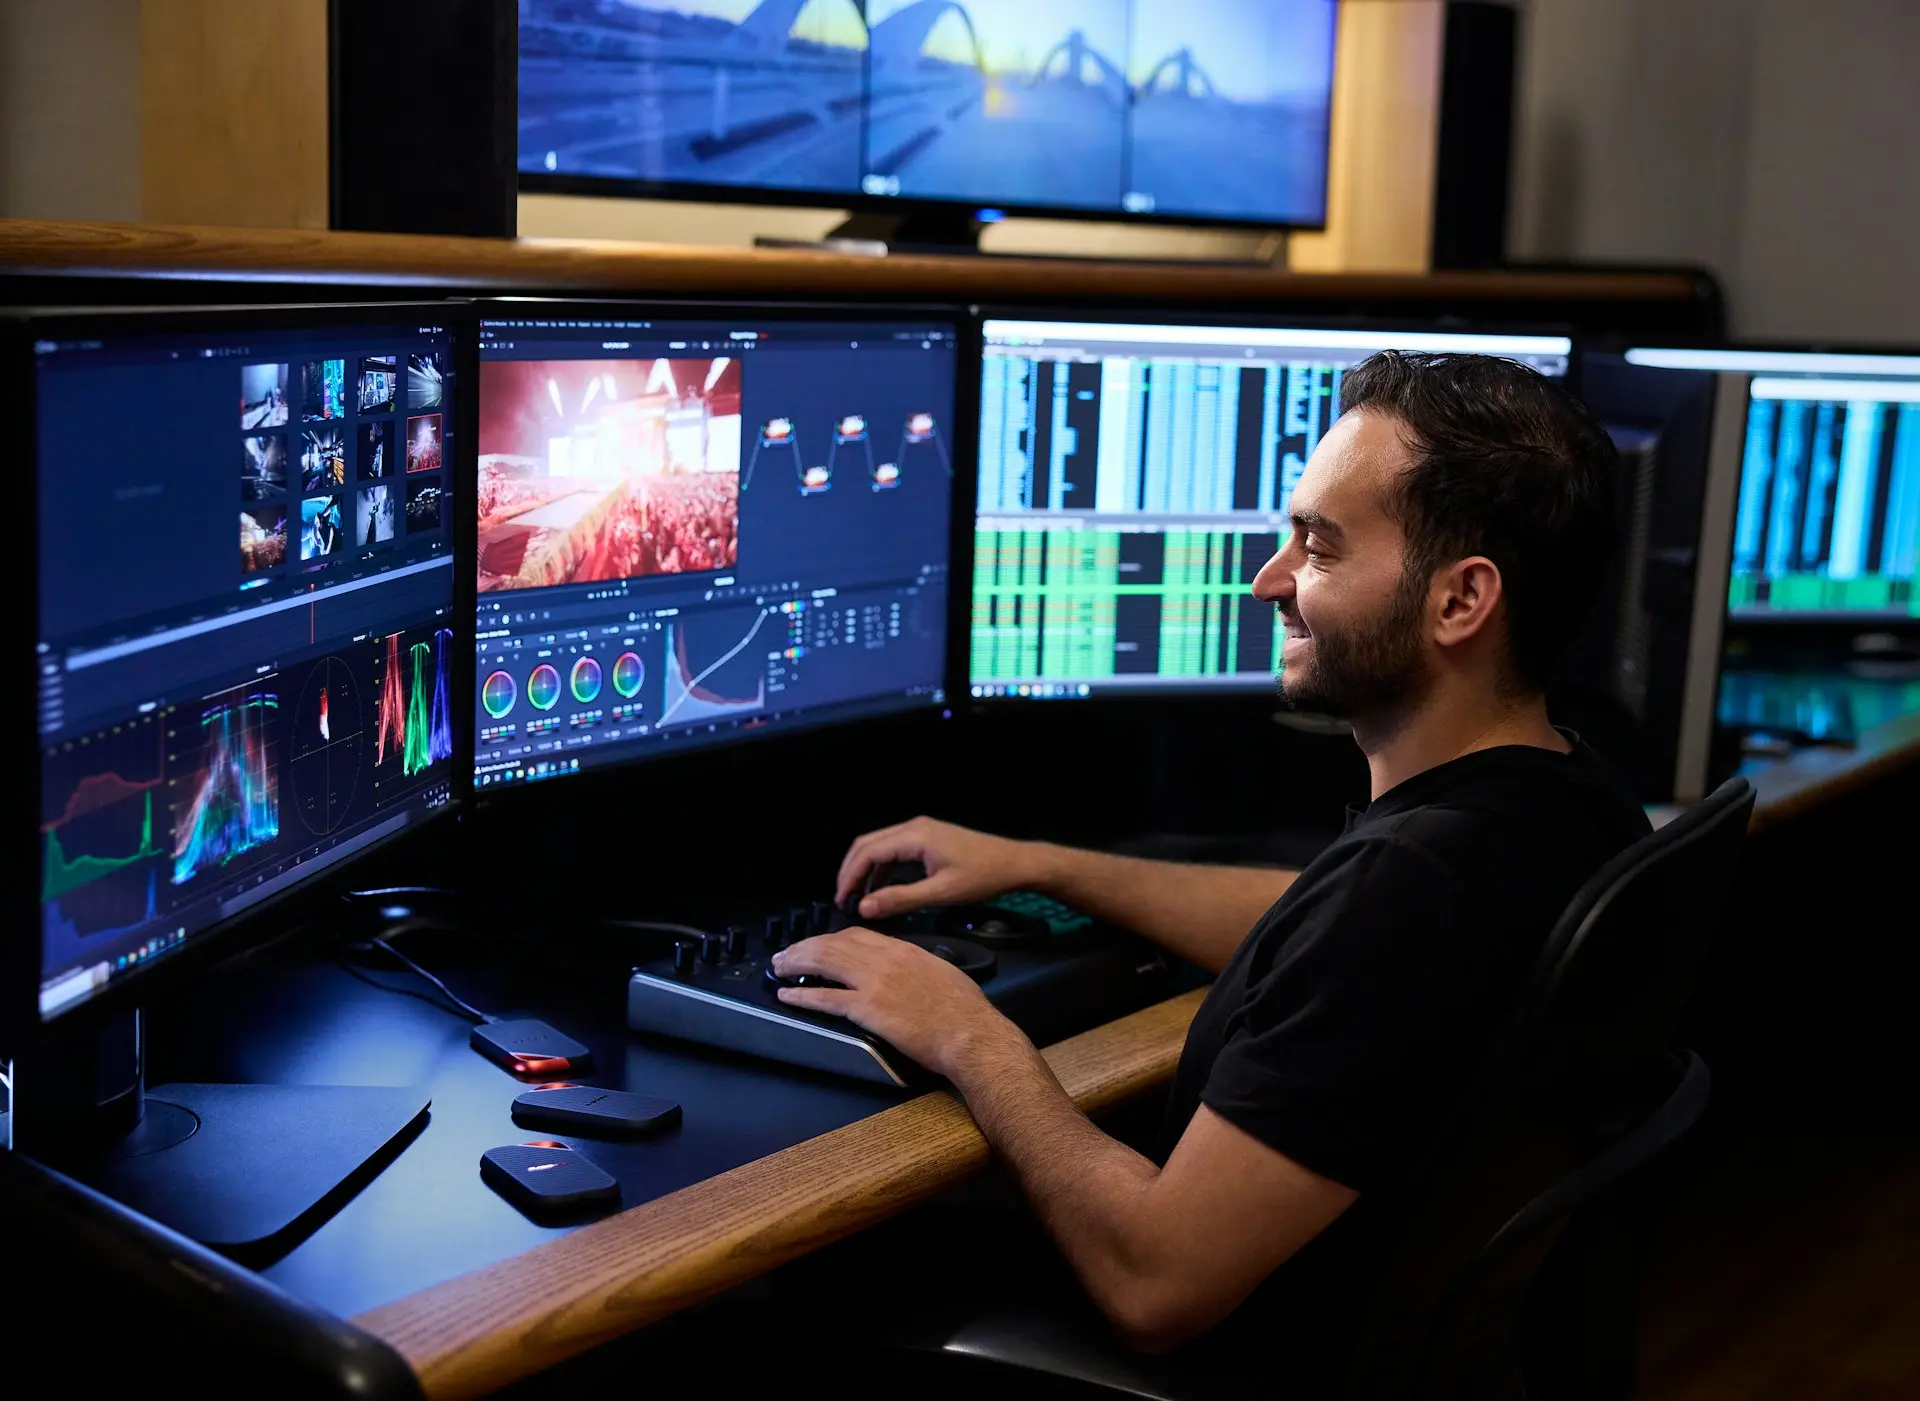
วิธีเขียน Prompt สร้างภาพ Microsoft Copilot แบบสมจริง ควรระบุรายละเอียดมากกว่าคำว่า “สร้างภาพเหมือนจริง” เพราะความสมจริงของภาพขึ้นอยู่กับหลายองค์ประกอบพร้อมกัน เช่น ตัวแบบ ฉาก แสง มุมกล้อง เลนส์ ระยะชัดลึก วัสดุ สีผิว เงา และบรรยากาศ
Microsoft Copilot รองรับการสร้างภาพจากข้อความ และคำอธิบายที่ละเอียดขึ้นช่วยกำหนดตัวละคร อารมณ์ ฉาก และสไตล์ เช่น Photorealistic ได้ชัดเจนขึ้น
สูตรที่ใช้ได้ง่ายคือ:
Subject + Action + Environment + Photorealistic Style + Lighting + Camera Angle + Lens Feel + Depth of Field + Material + Natural Imperfections
ตัวอย่าง:
“สร้างภาพ Photorealistic ของผู้หญิงวัยทำงานกำลังใช้โน้ตบุ๊กในสำนักงานสมัยใหม่ แสงธรรมชาติจากหน้าต่างด้านซ้าย มุมกล้อง 45 องศา ระยะภาพแบบ Portrait ฉากหลังละลายเล็กน้อย ผิวหน้าและเส้นผมมีรายละเอียดเป็นธรรมชาติ เสื้อผ้ามี Texture จริง โต๊ะมีเงาสะท้อนเล็กน้อย ภาพดูเหมือนถ่ายด้วยกล้องจริง”
ถ้าต้องการภาพเหมือนภาพถ่าย ควรระบุ Style ให้ชัด เช่น:
ตัวอย่าง:
“Create a photorealistic portrait…”
ชัดกว่าคำว่า:
“Create a beautiful portrait…”
เพราะคำว่า “สวย” ไม่ได้บอกลักษณะภาพ
Subject คือสิ่งหลักของภาพ
ตัวอย่าง:
Prompt:
“สร้างภาพสมจริงของช่าง IT กำลังติดตั้งสาย Network ในตู้ Rack”
ชัดกว่า:
“สร้างภาพเกี่ยวกับ IT”
ถ้าต้องการคนหนึ่งคน ให้บอก:
“ผู้หญิงหนึ่งคน”
ถ้าต้องการทีม:
“ทีมงาน 4 คน”
ช่วยควบคุม Composition ได้ดีขึ้น
รายละเอียดอาจมี:
ตัวอย่าง:
“ผู้ชายวัยประมาณ 35 ปี สวมเสื้อเชิ้ตสีดำ กำลังตรวจสาย Network ในตู้ Rack สีดำ”
ช่วยให้ภาพมีตัวแบบชัดขึ้น
เช่น:
“ผู้ชายวัยรุ่นอายุ 50 ปี”
หรือ
“สำนักงานสว่างมากและมืดสนิท”
คำสั่งที่ขัดกันทำให้ภาพควบคุมยาก
ภาพที่มี Action มักดูเป็นธรรมชาติกว่าการยืนโพสเฉย ๆ
ตัวอย่าง:
Prompt:
“ผู้หญิงกำลังพิมพ์งานบนโน้ตบุ๊กและมองหน้าจออย่างมีสมาธิ”
Environment มีผลต่อความสมจริงอย่างมาก
ตัวอย่าง:
Prompt:
“อยู่ในสำนักงานจริง มีโต๊ะทำงาน Monitor และเอกสารเล็กน้อยบนโต๊ะ”
ช่วยให้ฉากไม่ดูว่างแบบ Render
ฉากจริงมักไม่ได้สมบูรณ์แบบทุกอย่าง
อาจมี:
รายละเอียดเล็ก ๆ ช่วยเพิ่มความเป็นภาพถ่าย
ถ้ามีรายละเอียดมากเกิน:
Subject อาจไม่เด่น
ควรระบุว่า:
“Background มีรายละเอียดเล็กน้อยแต่ไม่รก”
Natural Lighting เป็นหนึ่งในวิธีทำให้ภาพดูเหมือนภาพถ่าย
Prompt:
“แสงเช้าธรรมชาติส่องเข้าจากหน้าต่างด้านขวา”
หรือ:
“Soft daylight from a large window”
ช่วยลดลักษณะภาพแบบ CGI
เช่น:
ตัวอย่าง:
“ใช้ Soft Side Light จากด้านซ้าย ทำให้มีเงาอ่อนบนใบหน้า”
ทำให้แสงดูมีที่มา
Soft Light เหมาะกับ:
เพราะเงาไม่แข็งมากเกินไป
ตัวอย่าง:
“Soft diffused lighting with natural shadows”
Hard Light สร้าง:
เหมาะกับ Fashion หรือ Cinematic มากกว่า Portrait ธรรมชาติบางประเภท
สำหรับ Outdoor:
“แสง Golden Hour ก่อนพระอาทิตย์ตก”
ช่วยให้ผิวและฉากมีสีอบอุ่น
วันที่มีเมฆให้แสงที่นุ่ม
Prompt:
“Outdoor portrait on an overcast day with soft natural light”
เหมาะกับ Portrait สมจริง
แสง Neon สีน้ำเงินและม่วงจำนวนมากอาจทำให้ภาพดูเป็น AI Art หรือ Sci-Fi
ถ้าต้องการสมจริง ให้ใช้เพียง Accent
ตัวอย่าง:
“Office lighting with subtle blue ambient light”
Camera Angle มีผลอย่างมาก
ตัวอย่าง:
สำหรับภาพคนธรรมชาติ:
“Eye-level camera angle”
มักดูเหมือนภาพที่คนถ่ายจริง
Prompt:
“ถ่ายระดับสายตาเหมือนช่างภาพยืนอยู่ตรงหน้าตัวแบบ”
เหมาะกับ:
เช่น:
ช่วยให้เห็นด้านหน้าและด้านข้างพร้อมกัน
Low Angle ทำให้ Subject ดู:
เหมาะกับรถยนต์ อาคาร หรือ Product Hero Shot
เหมาะกับ:
ช่วยเห็นองค์ประกอบหลายอย่างในฉาก
ตัวอย่าง:
Prompt:
“Medium shot เห็นคนตั้งแต่เอวขึ้นไป”
ช่วยควบคุม Crop
เหมาะกับ:
Prompt:
“Close-up ของมือกำลังเสียบสาย RJ45 โดยให้หัว Connector อยู่ใน Focus”
เหมาะกับ:
ช่วยให้เห็น Environment ชัดขึ้น
ภาพถ่ายจริงมักมีระยะชัดลึก
Prompt:
“Subject sharp, background softly blurred”
หรือ:
“Shallow depth of field”
ช่วยแยก Subject ออกจาก Background
หาก Background เบลอจนไม่รู้ว่าสถานที่คืออะไร อาจเสีย Context
ควรใช้:
“slightly blurred background”
สำหรับภาพที่ต้องการเห็น Environment
สามารถใช้คำเช่น:
ไม่จำเป็นต้องระบุค่ากล้องละเอียดทุกครั้ง
เหมาะกับภาพคน
ช่วยให้ใบหน้าเป็นธรรมชาติและ Background แยกออกจาก Subject
Prompt:
“portrait photography feel with natural perspective”
เหมาะกับ:
แต่ถ้าใช้ใกล้ใบหน้ามากเกินไปอาจทำให้สัดส่วนดูผิดธรรมชาติ
เหมาะกับ:
Prompt:
“Macro close-up of an RJ45 connector with realistic plastic texture and metallic contacts”
Texture สำคัญมากกับความสมจริง
ตัวอย่าง:
Prompt:
“realistic matte plastic texture with subtle reflections”
ช่วยให้สินค้าไม่ดูเป็นของเล่น
แทน:
“perfect skin”
ลองใช้:
“natural skin texture, subtle pores, realistic facial details”
ช่วยลดลักษณะผิวพลาสติก
Prompt:
“individual hair strands visible under natural light”
เหมาะกับ Portrait ที่ต้องการรายละเอียดสูง
เช่น:
“cotton shirt with visible fabric texture and natural folds”
ช่วยให้ผ้าไม่ดูเรียบเหมือนโมเดล 3D
โลกจริงไม่ได้สมมาตรสมบูรณ์ทุกจุด
สามารถระบุ:
ช่วยให้ภาพดูเป็นธรรมชาติมากขึ้น
คำอย่าง:
“perfect face, perfect office, perfect symmetry”
อาจทำให้ภาพดูสังเคราะห์
ควรใช้:
“natural realistic appearance”
Prompt:
“natural contact shadows under the product”
ทำให้วัตถุดูวางอยู่บนพื้นจริง ไม่ได้ลอย
วัสดุโลหะหรือกระจกควรมี Reflection
แต่ไม่ควรสะท้อนแรงทุกพื้นผิว
Prompt:
“subtle realistic reflections”
ตัวอย่าง:
“matte black aluminum body”
ต่างจาก:
“black product”
เพราะ Material ช่วยกำหนดวิธีสะท้อนแสง
สูตร:
Product + Material + Surface + Light + Angle + Background + Shadow
ตัวอย่าง:
“สร้างภาพ Router สีดำด้าน วางบนโต๊ะไม้สีเข้ม มุม 45 องศา ใช้ Soft Studio Light มีเงาธรรมชาติใต้สินค้า Background สีเทาเข้มเบลอเล็กน้อย”
สูตร:
Person + Clothes + Action + Environment + Natural Light + Camera + Skin Detail
ตัวอย่าง:
“ผู้หญิงวัยทำงานสวมเสื้อเชิ้ตสีขาว กำลังใช้โน้ตบุ๊กในสำนักงาน แสงธรรมชาติจากหน้าต่าง มุมระดับสายตา ผิวและเส้นผมเป็นธรรมชาติ”
“สร้างภาพ Photorealistic ของผู้ชายวัยประมาณ 35 ปี สวมเสื้อเชิ้ตสีดำ กำลังทำงานหน้า Desktop Computer ในสำนักงานสมัยใหม่ แสงธรรมชาติจากด้านข้าง ผิวหน้าและเส้นผมสมจริง Medium Shot ฉากหลังเบลอเล็กน้อย”
“สร้างภาพ Photorealistic ของผู้หญิงวัยทำงานกำลังพิมพ์งานบนโน้ตบุ๊กที่โต๊ะสำนักงาน แสงเช้าอ่อนจากหน้าต่าง สีผิวและ Texture เสื้อผ้าเป็นธรรมชาติ Eye-level camera, shallow depth of field”
“สร้างภาพสมจริงของมือผู้หญิงกำลังถือ Smartphone ให้ตัวเครื่องอยู่ใน Focus รายละเอียดผิวมือเป็นธรรมชาติ ฉากหลังสำนักงานเบลอเล็กน้อย”
“ช่าง IT ผู้ชายกำลังจัดสาย Network ในตู้ Rack ใช้เครื่องมือจริง แสงห้อง Server แบบธรรมชาติ รายละเอียดสายและอุปกรณ์ชัด สีไม่จัดเกินจริง”
“Photorealistic modern server room with rows of black server racks, realistic ceiling lights, visible cabling details, natural reflections on the floor, wide-angle photography.”
“Photorealistic modern office with desks, monitors, notebooks and small everyday objects, soft daylight from windows, realistic shadows, natural neutral colors.”
“โต๊ะทำงานในบ้านแบบสมจริง มีโน้ตบุ๊ก แก้วกาแฟ สมุดจด และโคมไฟ แสงธรรมชาติยามเช้า มีรายละเอียดเล็กน้อยแบบบ้านที่ใช้งานจริง”
“สร้างภาพ Desktop Computer สีดำพร้อม Monitor บนโต๊ะทำงานจริง แสงจากหน้าต่างผสมแสง Monitor เล็กน้อย มี Keyboard, Mouse และสายบางส่วน visible แบบธรรมชาติ”
“โน้ตบุ๊กสีดำวางบนโต๊ะไม้ เปิดหน้าจอทำงาน มีมือคนกำลังพิมพ์ แสงธรรมชาติจากหน้าต่าง Background สำนักงานเล็กน้อย ภาพเหมือนถ่ายจริง”
“Smartphone อยู่ในมือผู้ชาย หน้าจอเปิดแอปทำงาน มุม Close-up แสงจากหน้าต่าง ผิวมือและวัสดุโทรศัพท์สมจริง”
“Photorealistic black sedan parked on a real city street after light rain, natural reflections on wet pavement, soft cloudy daylight, low-angle automotive photography.”
“Photorealistic Thai food on a ceramic plate, natural window light, realistic steam, visible texture of ingredients, 45-degree food photography, restaurant background softly blurred.”
“Photorealistic modern house exterior during late afternoon, realistic concrete, glass reflections, plants and natural shadows, eye-level architectural photography.”
“Photorealistic commercial product photo of [สินค้า] on a clean white background, soft studio lighting, realistic shadow beneath the product, accurate material texture.”
“Photorealistic premium product photography of [สินค้า], matte black background, subtle rim light, realistic contact shadow, controlled reflections.”
“สร้างภาพสินค้า [สินค้า] กำลังถูกใช้งานจริงใน [สถานที่] โดยให้สินค้าเป็นจุด Focus หลักและฉากรอบ ๆ ดูเป็นธรรมชาติ”
“Photorealistic lifestyle product image of [สินค้า] being used in a real home office, natural daylight, authentic desk objects, realistic shadows and textures.”
ภาพสมจริงไม่ได้หมายความว่าสีต้องจัด
สามารถใช้:
Prompt:
“neutral white balance with slightly warm skin tones”
เหมาะกับ Portrait
ถ้าต้องการภาพจริง:
“natural color grading, moderate saturation”
มักสมจริงกว่า:
“extremely vibrant colors”
คำว่า:
“natural photographic color grading”
ช่วยกำหนดโทนให้ใกล้ภาพถ่าย
Photorealistic ไม่จำเป็นต้องดูธรรมดา
สามารถใช้:
“cinematic but realistic”
โดยมี:
“Photorealistic cinematic office scene, realistic practical lighting, soft contrast, natural skin tones, shallow depth of field, subtle film-like color grading.”
เช่น:
จะทำให้ภาพออกไปทาง Digital Art
หากต้องการ:
“subtle natural lens flare from sunlight”
ดีกว่า:
“huge cinematic lens flare”
สำหรับภาพสมจริงทั่วไป
Prompt:
“background softly out of focus but still recognizable as an office”
ช่วยให้ Subject เด่นและ Context ยังอยู่
บางภาพสามารถเพิ่ม Foreground เล็กน้อย เช่น
เพื่อเพิ่มความลึกของภาพ
Prompt:
“slightly blurred foreground object for natural depth”
ภาพจริงมักมี:
ช่วยสร้าง Depth
“compose with subtle foreground objects, sharply focused main subject, and softly blurred background”
เหมาะกับภาพ Lifestyle
ตัวอย่าง:
“เช้าวันทำงานเวลาแสงแดดยังอ่อน”
“ช่วงเย็นหลังฝนตก”
ช่วยสร้างแสงและ Mood ที่สมเหตุสมผล
“Photorealistic city office at night, practical ceiling lights and monitor glow, realistic low-light exposure, natural shadows, no excessive neon.”
“realistic rainy city street with wet pavement reflections, overcast sky, pedestrians carrying umbrellas, documentary photography style”
Documentary Photography เหมาะกับภาพที่ต้องการความรู้สึกไม่จัดฉากมาก
ตัวอย่าง:
“documentary-style photo of an IT technician working inside a server room”
Prompt:
“candid moment, subject not looking directly at camera”
ทำให้ภาพคนดูเป็นธรรมชาติมากขึ้น
“Photorealistic candid office scene of two coworkers discussing a report beside a laptop, natural body language, soft daylight, realistic workspace.”
ภาพทีมที่ทุกคนยิ้มและมองกล้องพร้อมกันอาจดูเหมือน Stock Photo
ถ้าต้องการธรรมชาติ ใช้:
“coworkers focused on their work, not posing for camera”
ระบุ:
“natural relaxed posture”
“realistic hand placement”
ช่วยลดท่าทางแข็ง
ถ้ามืออยู่ใกล้ Subject ควรบอกว่า:
“natural hand positioning”
โดยเฉพาะภาพ:
“Close-up of a natural human hand holding [สินค้า], realistic fingers and skin texture, product fully visible, soft daylight.”
เพิ่มคำสั่ง:
“hand grips the edge without covering the product details”
เหมาะกับ Ecommerce Image
Prompt:
“Photorealistic wide website hero image of a modern IT workspace, real employees working naturally, black and blue technology accents, soft realistic office lighting, negative space on the left.”
“Photorealistic image illustrating [หัวข้อ] using a real-world scene rather than abstract AI symbols, natural lighting, clean composition.”
ช่วยให้ภาพเข้ากับเนื้อหามากขึ้น
“Photorealistic social media image with one clear subject, strong but natural contrast, realistic lighting, uncluttered background.”
“Wide photorealistic commercial image, subject positioned on the right, realistic environment, soft directional lighting, clean negative space on the left.”
Thumbnail ต้องชัดแม้ขนาดเล็ก
Prompt:
“large main subject, simple realistic background, strong natural contrast, clear silhouette”
“Photorealistic side-by-side product comparison using the same camera angle, lighting, scale and background for both products.”
ช่วยให้เปรียบเทียบอย่างเป็นธรรม
“Create a realistic before-and-after comparison with identical camera position, lighting and scene composition.”
เหมาะกับการแสดงการเปลี่ยนแปลงจริง
สำหรับงานกราฟิก:
“leave clean negative space on the right side for headline text”
ช่วยให้นำไปแต่งต่อได้ง่าย
ควรระบุ:
“no text, no captions, no logo”
เหมาะกับภาพที่ต้องนำไปใส่ข้อความเอง
“clean realistic background with minimal distractions”
ต่างจาก:
“empty artificial background”
ซึ่งอาจทำให้ภาพดูเป็น Render
ถ้ามีภาพต้นแบบ สามารถใช้เป็น Reference แล้วระบุว่า:
ควรมีสิทธิ์ใช้ภาพที่นำมาเป็นต้นแบบหรือแก้ไขด้วย
“คง Subject และ Composition เดิม แต่ปรับแสง เงา วัสดุ และ Texture ให้ใกล้ภาพถ่ายจริงมากขึ้น”
“คง Subject เดิม เปลี่ยน Background เป็นสำนักงานจริงที่มีรายละเอียดเล็กน้อยและแสงธรรมชาติ”
“reduce stylized digital-art appearance, use realistic materials, natural lighting, subtle imperfections and photographic color grading”
ช่วยเปลี่ยน Direction
“make the image look like real photography instead of a 3D render”
ตรงและชัด
“use natural skin texture and realistic facial details, avoiding overly smooth plastic-looking skin”
ช่วยปรับ Portrait
“replace artificial glowing light with soft natural window lighting and realistic shadows”
“use neutral realistic colors and reduce excessive saturation”
“reduce futuristic elements and replace them with realistic office furniture and equipment”
หลังได้ภาพที่ชอบ:
“สร้าง Variation โดยคงคน เสื้อผ้า ฉาก และ Mood เดิม แต่เปลี่ยนมุมกล้องเป็นด้านข้าง”
ช่วยสร้างชุดภาพต่อเนื่อง
ถ้าภาพเกือบตรง ไม่ควรเปลี่ยนพร้อมกัน:
ทั้งหมด
เพราะจะไม่รู้ว่าอะไรทำให้ภาพดีหรือแย่ลง
ตัวอย่าง:
รอบแรก:
ได้ภาพดีแต่แสงแรงไป
รอบสอง:
“คงภาพเดิมทั้งหมด ลดความเข้มของแสงด้านซ้ายประมาณครึ่งหนึ่ง และให้เงานุ่มขึ้น”
เฉพาะเจาะจงกว่า Generate ใหม่
“สร้างภาพ Photorealistic ของ [Subject]
Subject:
[รายละเอียด]
Action:
[กำลังทำอะไร]
Environment:
[สถานที่]
Lighting:
[แสงและทิศทาง]
Camera:
[มุมกล้อง]
Shot:
[Close-up / Medium / Wide]
Depth of Field:
[ระดับการเบลอ]
Materials:
[รายละเอียดวัสดุ]
Color:
[โทนสี]
Mood:
[อารมณ์]
Composition:
[ตำแหน่ง Subject]
เพิ่ม:
ข้อกำหนด:
Template นี้ใช้เป็นจุดเริ่มต้นกับภาพสมจริงได้หลายประเภท
“สร้าง Photorealistic Portrait ของ [บุคคล] สวม [เสื้อผ้า] อยู่ใน [สถานที่] แสงธรรมชาติจาก [ทิศทาง] มุมระดับสายตา ผิวและเส้นผมมี Texture เป็นธรรมชาติ Background เบลอเล็กน้อย สีผิวเป็นธรรมชาติ”
“สร้าง Commercial Product Photography ของ [สินค้า] วัสดุ [Material] วางบน [Surface] ใช้ Soft Studio Light มี Natural Contact Shadow และ Subtle Reflection มุมกล้อง 45 องศา Background สะอาด”
“สร้างภาพสำนักงานสมัยใหม่แบบ Photorealistic มีพนักงานกำลังทำงานจริง ไม่มองกล้อง โต๊ะมีสิ่งของใช้งานเล็กน้อย แสงธรรมชาติจากหน้าต่าง เงาและสีสมจริง”
“สร้างภาพช่าง IT กำลังทำงานกับตู้ Network Rack แบบ Photorealistic เห็นสายและอุปกรณ์ตามจริง ใช้แสงห้อง Server ธรรมชาติ ท่าทางไม่โพส ฉากไม่รก”
“Photorealistic black laptop on a real wooden office desk, person typing naturally, daylight from a nearby window, subtle screen glow, realistic reflections and shadows, shallow depth of field.”
“Photorealistic black desktop computer and monitor in a modern working office, realistic cables and desk accessories, natural daylight mixed with subtle monitor light, 45-degree photography.”
“Photorealistic smartphone held naturally in one hand, realistic skin texture, device screen clearly visible, soft daylight, office environment softly blurred.”
“Photorealistic data center with server racks, realistic structured cabling, practical overhead lights, subtle floor reflections, natural industrial details, wide-angle photography.”
“Photorealistic product photo for ecommerce, accurate product proportions, realistic material texture, clean neutral background, controlled studio lighting, natural contact shadow, no text.”
รายละเอียดไม่พอ
ภาพดูไม่เป็นธรรมชาติ
ดูเป็น Digital Art
ดูเหมือน 3D Render
ดูเป็นพลาสติก
ลดความเป็นภาพถ่าย
ควบคุมผลได้ยาก
ตรวจว่า:
ใช้ลำดับ:
ช่วยให้แก้ปัญหาได้ตรงจุดกว่าการใช้คำว่า “ทำให้เหมือนจริงกว่าเดิม” ซ้ำ ๆ
สูตรคือ:
Subject → Action → Real Environment → Natural Light → Camera → Depth → Texture → Imperfection
ตัวอย่าง:
“สร้างภาพ Photorealistic ของผู้ชายวัยทำงานกำลังใช้ Desktop Computer ในสำนักงานจริง แสงธรรมชาติจากหน้าต่างด้านซ้าย มุม Eye Level แบบ Medium Shot ฉากหลังเบลอเล็กน้อย ผิว เสื้อผ้า โต๊ะ และอุปกรณ์มี Texture จริง มีเงาและ Reflection ตามธรรมชาติ”
ภาพที่ดูสมจริงไม่ได้เกิดจากการใส่คำว่า Photorealistic เพียงคำเดียว แต่ต้องทำให้องค์ประกอบต่าง ๆ มีเหตุผลเหมือนการถ่ายภาพจริง โดยเฉพาะ แสง มุมกล้อง ระยะชัดลึก พื้นผิว เงา และบริบทของสถานที่
สำหรับผู้อ่าน comsiam สูตรที่ควรจำคือ “Subject → Environment → Natural Lighting → Camera → Texture → Natural Imperfections” ถ้าหกส่วนนี้ชัด Prompt จะควบคุม Visual Direction ได้ง่ายขึ้นมาก
comsiam แนะนำให้เมื่อได้ภาพที่เกือบตรงแล้ว อย่าเขียน Prompt ใหม่ทั้งหมด แต่ให้แก้ทีละจุด เช่น แสง ฉาก มุมกล้อง หรือ Texture วิธีนี้จะช่วยรักษาส่วนที่ดีของภาพเดิมไว้ และค่อย ๆ ปรับภาพให้ใกล้ความสมจริงที่ต้องการมากขึ้น